A Wall Paper Transformation with Milton and King
- Nini

- Dec 22, 2019
- 4 min read
Updated: Dec 30, 2019
We did a lot of room to room shuffling over these last few months. The clean up and revamp has been ongoing but oh, so needed. While some major lived in spots of our home got a refresh, my poor craft area got very neglected. I was feeling a lack of creativity when it came to my paper flowers. It was no surprise that this was partly due to the messy space all my supplies were living in. Here's a before photo of the space. Keep in mind this is a "cleaned up" before picture. It was even worse than this most of the time.

Something else to note: This room is in our basement so getting good light in here for photos is difficult. We also did this project in two parts (started in the afternoon and finished in the evening) so you'll notice the lighting in the room looks a bit off in some of the progress pictures.
After stumbling across Milton and King on Instagram, I realized a wall paper refresh would make a huge difference in this sad space. The other half of this room is my husband's work office so a bit of nudging had to happen. After I promised this project would mean a cleaner, organized craft area...he was on board.
First I narrowed down my choices. Milton and King's website has such an incredible selection that it was hard to pick just a few! These were my top two winners:

If you're feeling unsure about your final pick, I highly recommend getting samples. They'll help you visualize what the colors and design will look like in your space.
Since my husband's work desk is just a few feet from this spot, I didn't want to overwhelm him with too bold of a choice. We went with Sophie's Garden in cream since the colors were more subdued. It’s a gorgeous floral wallpaper with a childlike sensibility.
Milton and King sent us two rolls. This was plenty for this wall.
As you can see, this area has two windows and one built in shelf that goes all the way across.

These obstructions meant lots of extra cuts and some wall paper wastage. (Keep the wastage! Those extra scraps are great for adding finishing touches to furniture or other pieces you want to accent. I added some left overs to some of my craft organizers. Check them out at the end of this post.)

First we cleared the room. There was lots to clear. I also got rid of a ton. The urge to purge is a magical thing.
Next my husband used wall plaster to cover up holes from nails from where old decor had been.
If the wall you are adding wall paper to is completely flat, this project will be a piece of cake. If you are dealing with windows, built in shelving, etc. it will not be impossible but will take more time and measuring.
We started with the bottom half first. Since this part is completely flat with no obstructions, it was a breeze. The wall paste was easy to apply and dried quickly. Here's the brand we used.


The top half of the wall was another story. We began with the middle section and then worked our way out to the sides. Looking back now, we should have gone from the left side of the wall to right. This would have required a little less planning with having to make sure the wall paper design lined up perfectly. (If for some reason you need to work from the middle out, note that doing so will be more time consuming. You'll need to make sure the wall paper lines up correctly in two different directions.)


The top half of the wall took my husband three times longer to do (insert disgruntled, face slap emoji). For this part, our toddler and 8 month old were also very much awake so my hands were much less available to help.

Nonetheless, Joe worked through it like a champ (rocking out to heavy metal while putting up feminine, floral-y wall paper for me). The final edges and extra parts under the window I completed. I enjoyed cutting out pieces for these odd nooks and crannies.

I measured and cut a few pieces at a time and then lined them up as perfectly as I could.

After impatiently waiting for a day where the sunlight was cooperating, I was able to snap these "after" photos:


I've had this beautiful vase handmade by my aunt for years. It's finally found the spot it was destined to sit in... right next to this beautiful wall paper!

Joe got this antique pie safe for me as an anniversary gift. Doesn't it make a perfect paper organizer?
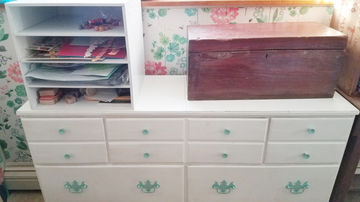
Earlier in this post I wrote about keeping the left over wall paper scraps. Here's the makeover I gave these two craft organizers:

For newbie wall paper-ers, I'd say we did a pretty dang good job. I'm so amazed by how this DIY transformed this spot. It feels amazing to be so excited about creating again. Thank you Milton and King!


Comments